Effortless Instance Access: Connect & Manage with Cloudshot Terminal
Access Instance Terminal with Cloudshot
With Cloudshot, you get instant terminal access to your AWS, Azure, and GCP instances—all in one place.
- Watch Our Step-by-Step Guide on Accessing AWS Instances with Cloudshot Terminal:
Step 1: Select Your Instance
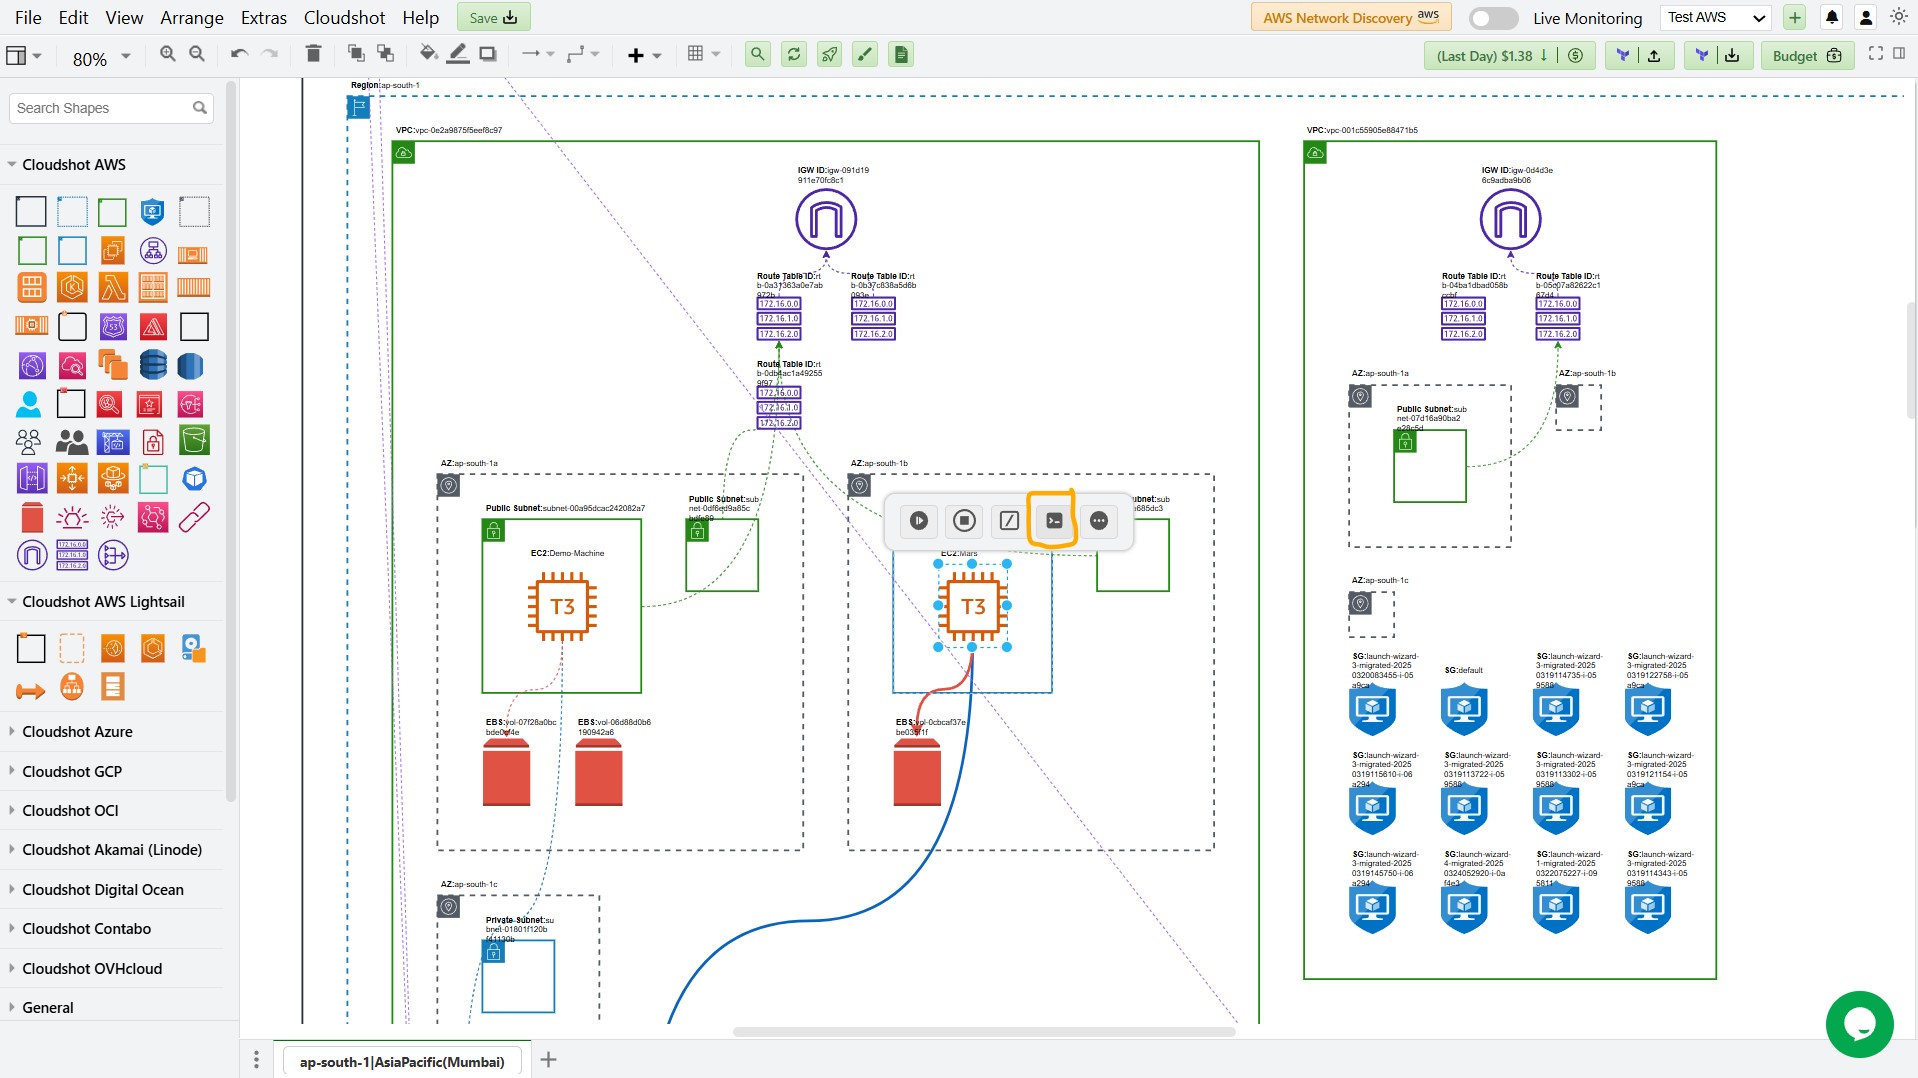
- Open Cloudshot and retrieve your AWS diagram by clicking the 'AWS Network Discovery' button in the menu bar.
- Locate the EC2 instance.
- Click on the highlighted 'Show Terminal' option.
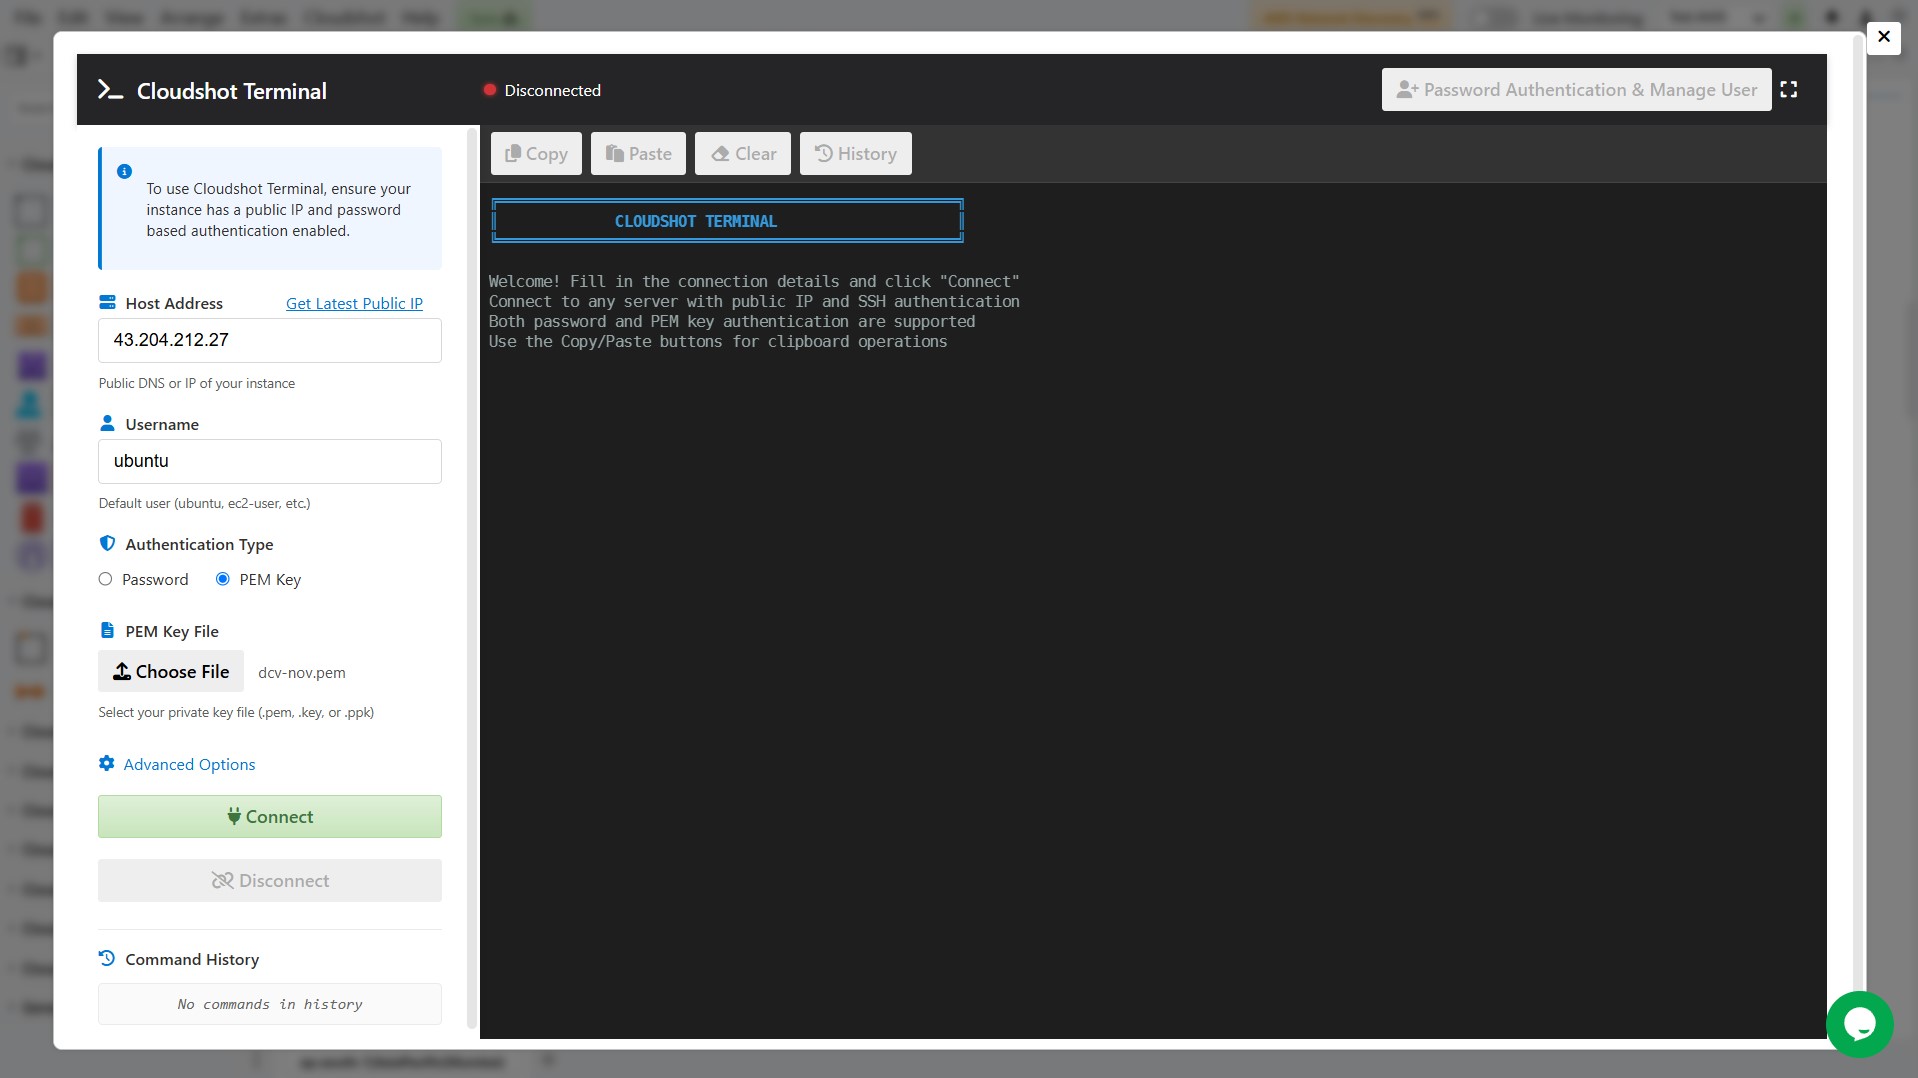
Once you click on 'Show Terminal', the 'Cloudshot Terminal' window will open.
Before proceeding, ensure the following:
- Your instance has a public IP.
Now, choose the authentication method:
- Password – Enter the instance password
- PEM Key – Upload your private key file (.pem)
Once selected, click the 'Connect' button to access your AWS instance.
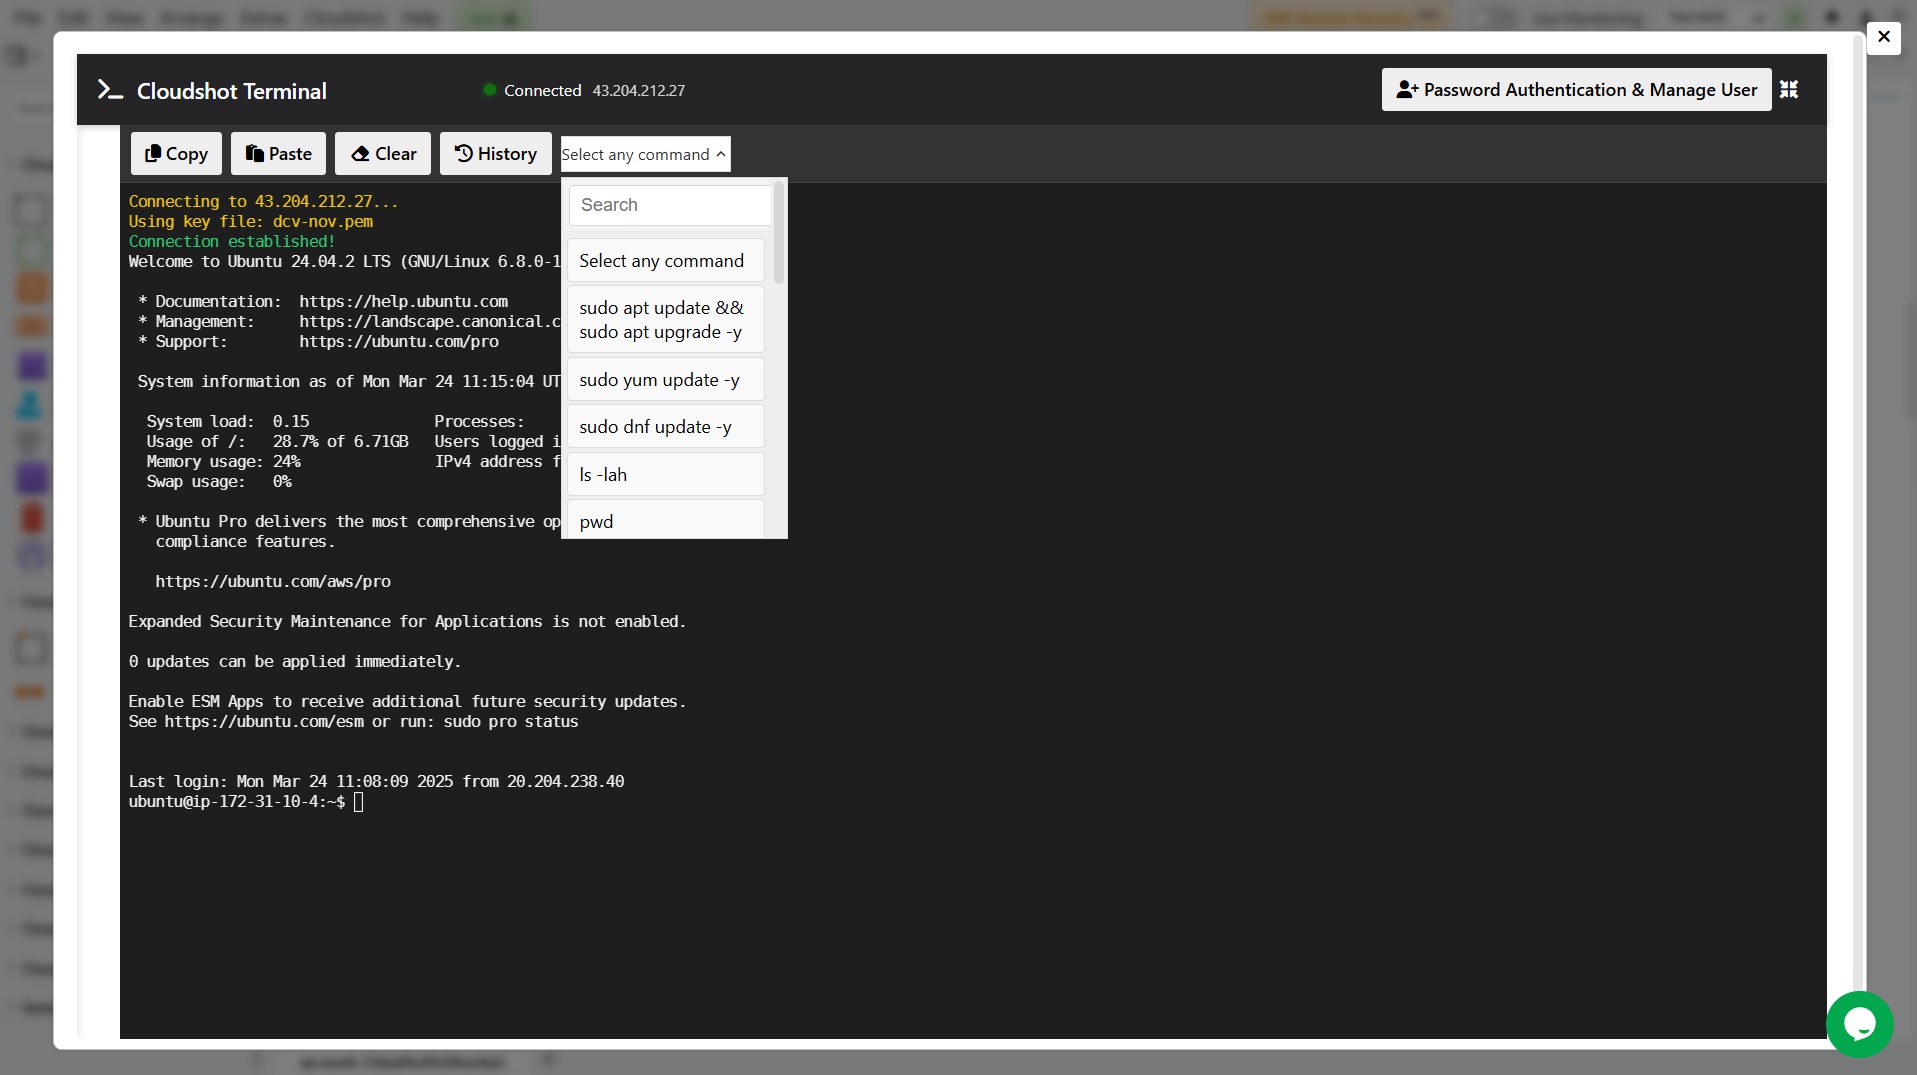
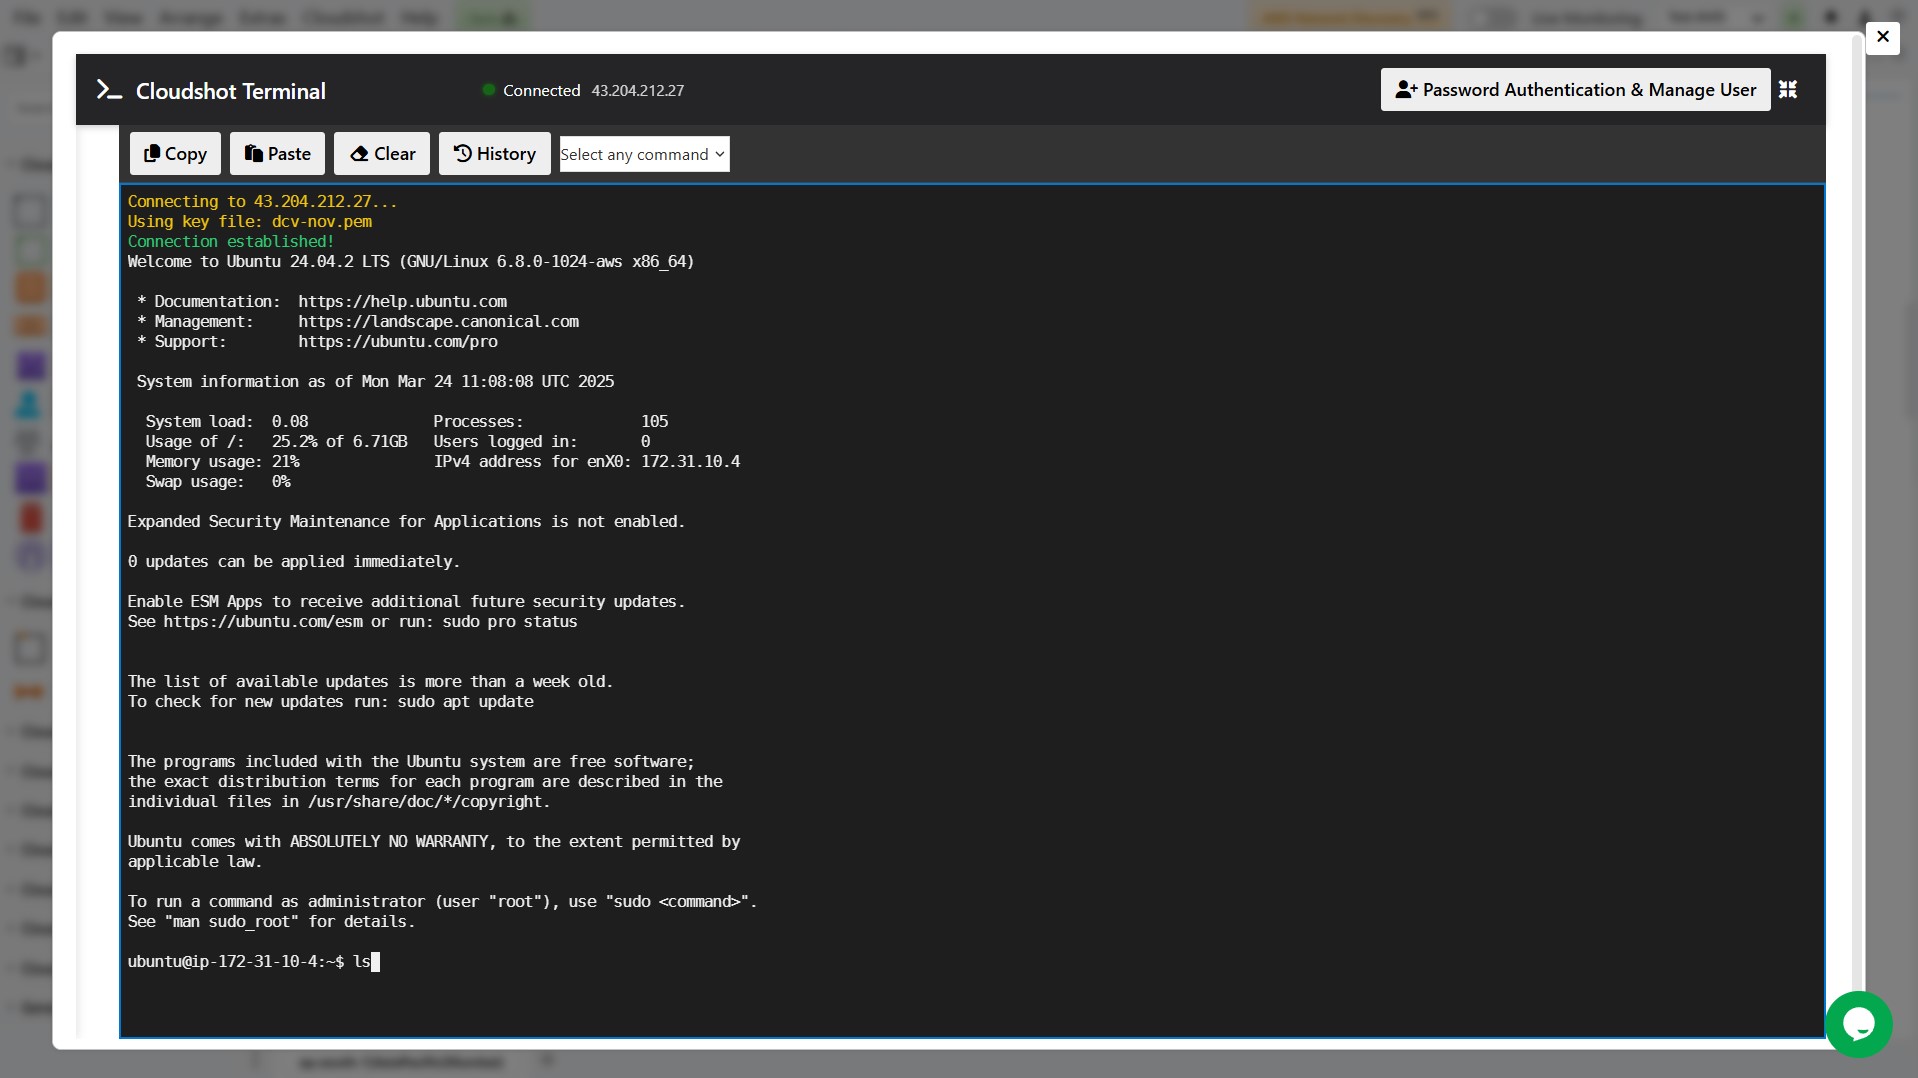
After clicking the 'Connect' button in the Cloudshot Terminal, you will see that the connection has been successfully established. You are now inside your AWS instance and can execute commands.
Step 3: Execute Commands in Cloudshot Terminal
To run a command, you have two options:
Select from the dropdown menu – Cloudshot provides a list of commonly used commands like:sudo apt update && sudo apt upgrade -y (for Ubuntu)
sudo yum update -y (for RHEL-based systems)
ls -lah (to list files)
pwd (to check the current directory)
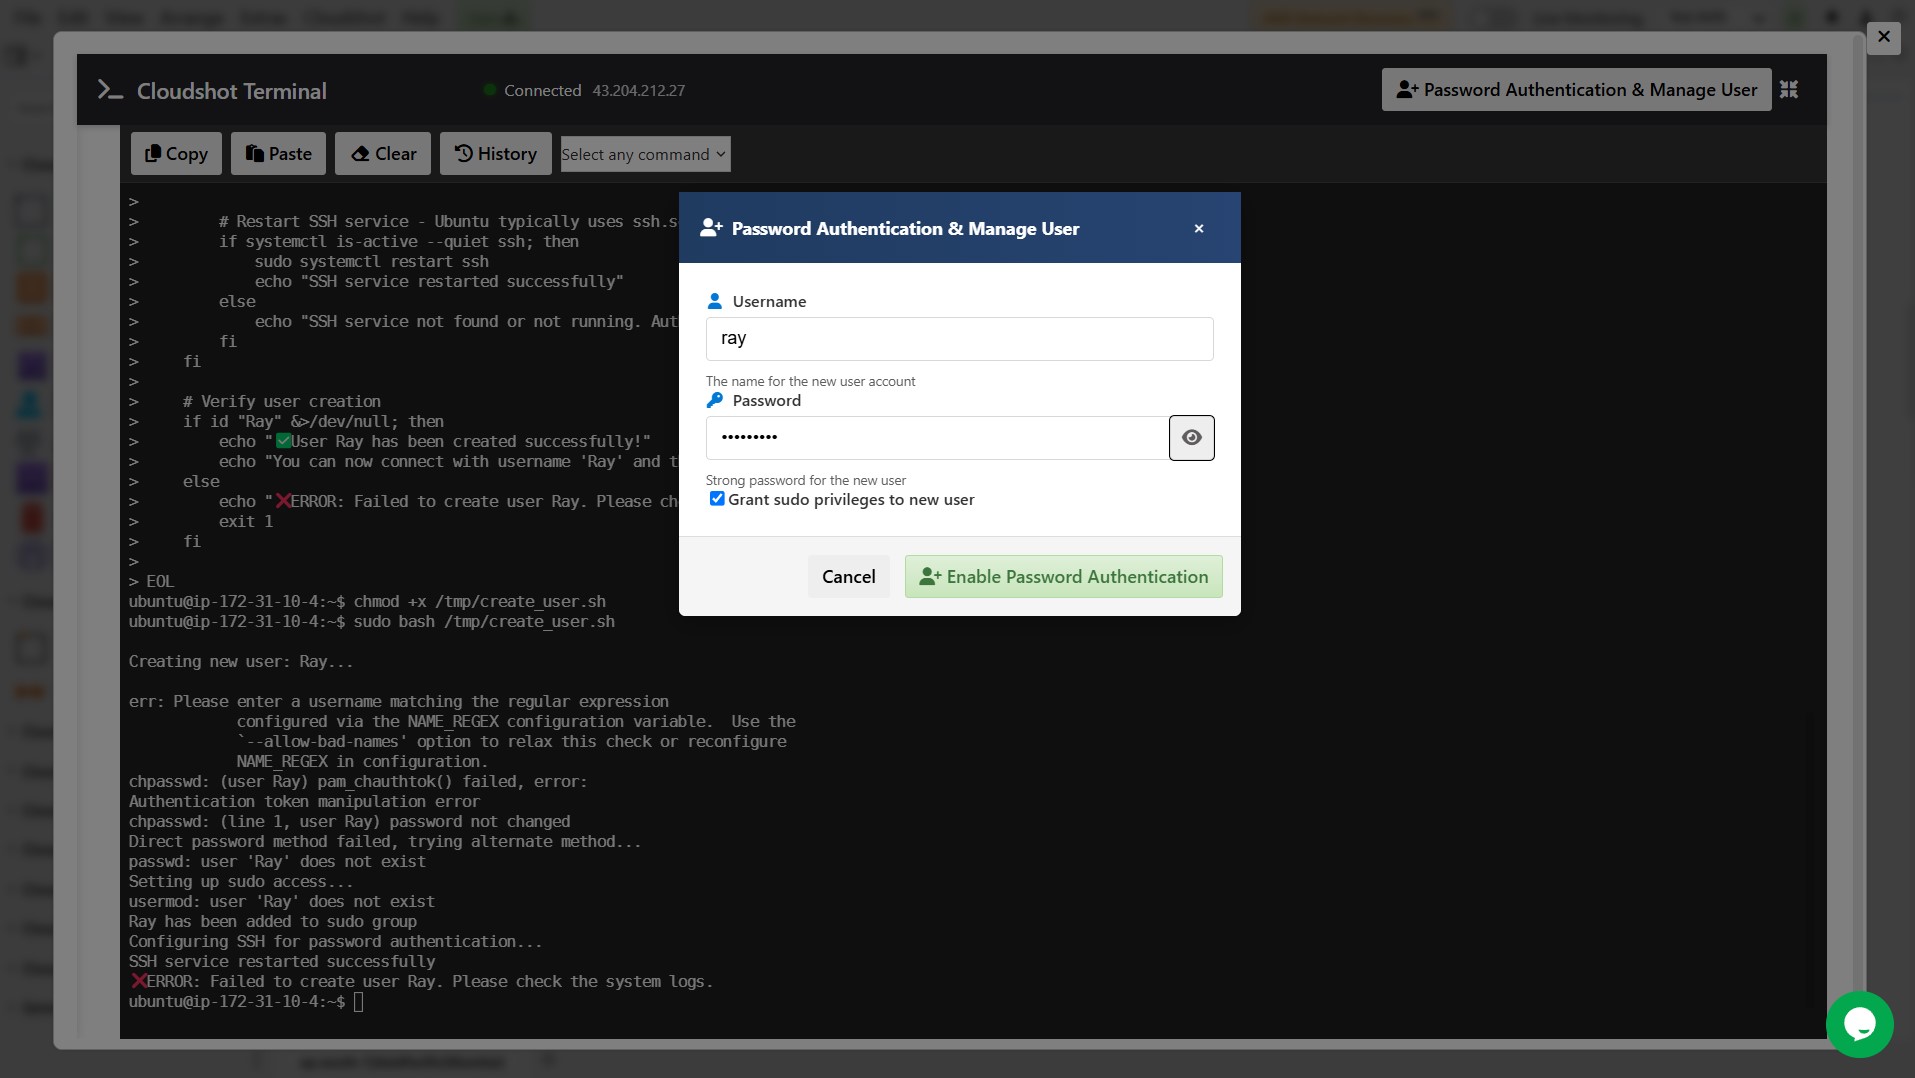
Step 4: Add a New User or Manage an Existing User in Cloudshot Terminal
Enter the Username
If adding a new user, type the desired username.
If managing an existing user, enter their current username.
Set or Enter the Password
For a new user, create a strong password.
For an existing user, enter their current password.
Grant Sudo Privileges (Optional)
Checked ✅: The user will have administrator (sudo) access.
Unchecked ⬜: The user will be a normal (non-admin) user.
Enable Password Authentication
Click 'Enable Password Authentication' to confirm the settings.
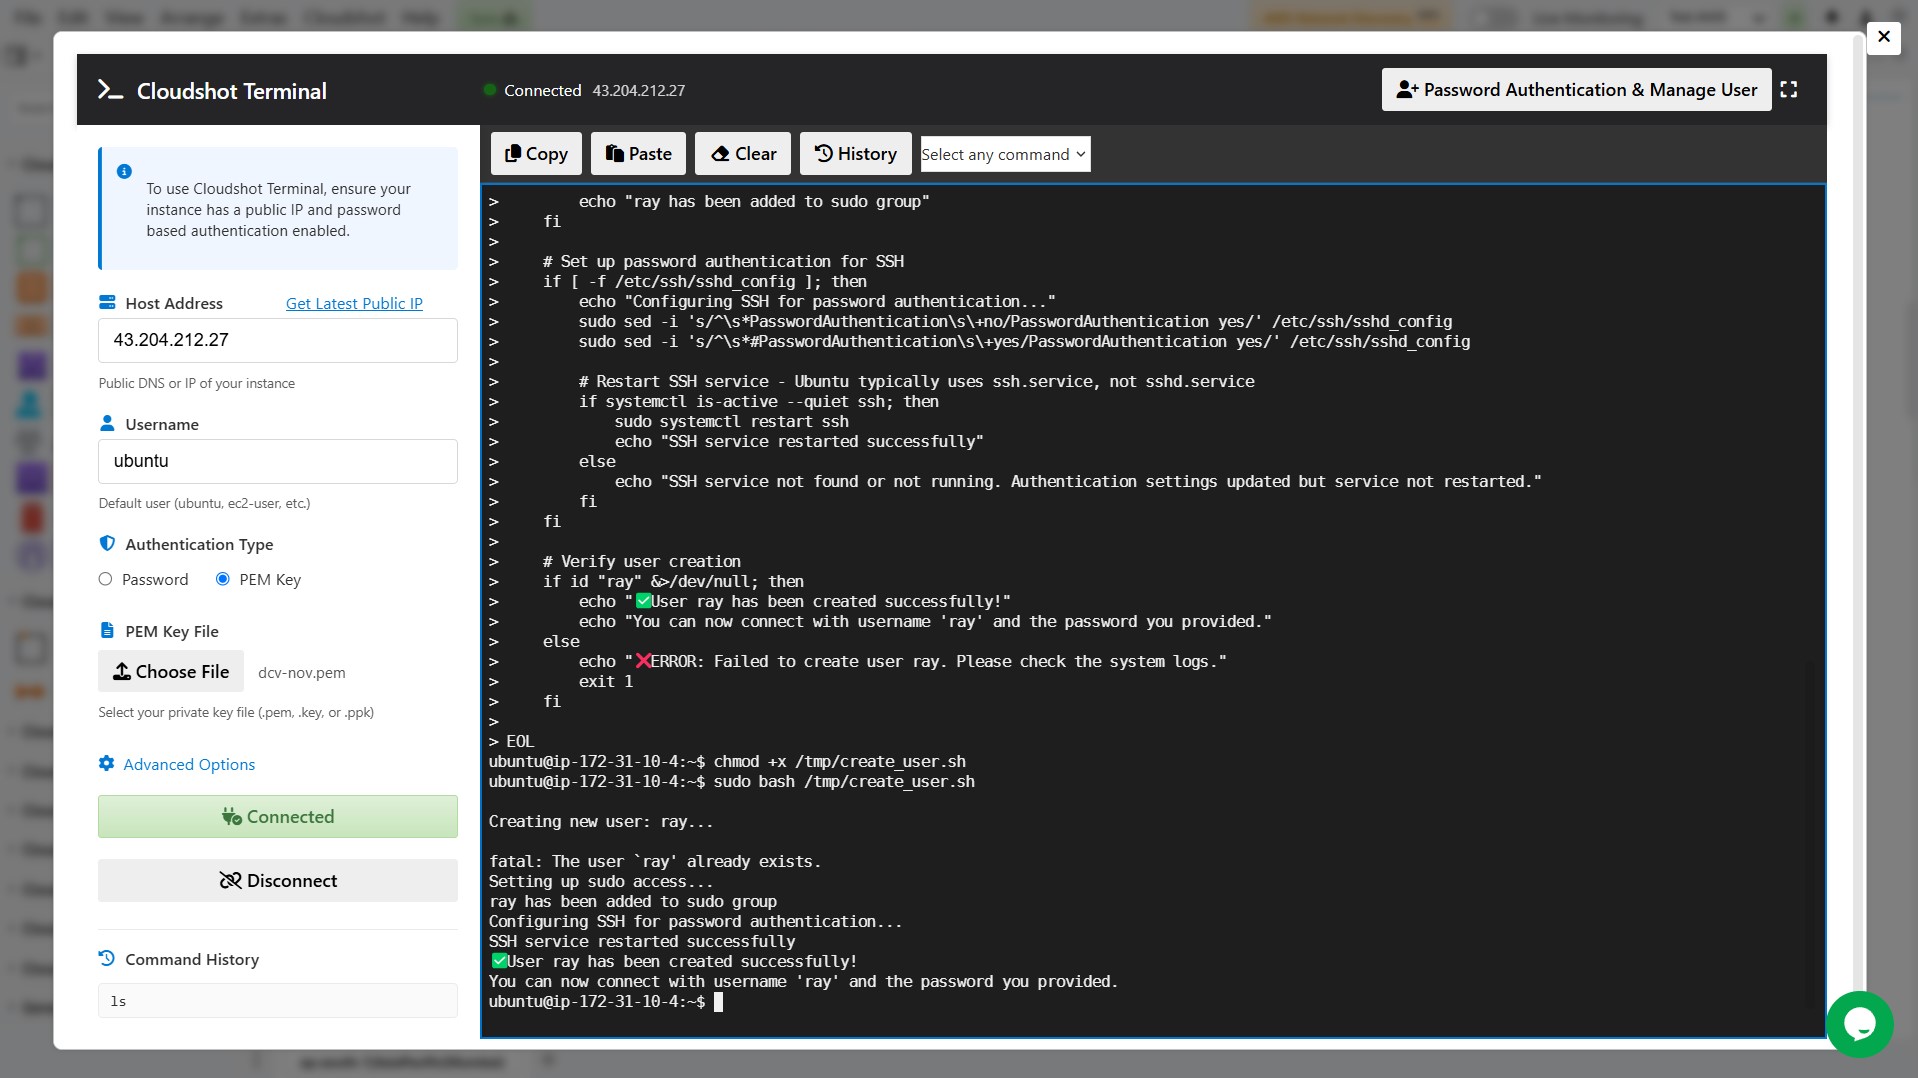
Once the process is complete, Cloudshot Terminal will display a confirmation message:
The message 'User ray has been created successfully!' confirms the user setup.
You can now connect using the username 'ray' and the provided password.

Once you have executed commands in the Cloudshot Terminal, you can review them using the Command History feature.
How to Access Command HistoryLook at the left panel in Cloudshot Terminal.
Under Command History, you will see a list of previously executed commands.
Step 7: Disconnect from Cloudshot Terminal
Once you're done managing your instance, you can disconnect from the Cloudshot Terminal at any time. Simply click the 'Disconnect' button to safely end your session.
With Cloudshot Terminal, managing users, executing commands, and tracking history becomes seamless and efficient. Whether you're setting up authentication, running system updates, or reviewing past commands, Cloudshot provides a streamlined experience for secure and effective cloud management.
💡 Pro Tip:
Before connecting, ensure your instance has a public IP and the correct authentication method is selected. If managing users, verify sudo privileges and password authentication settings to avoid access issues.
Take Control Today:
Connect to AWS, Azure, and GCP instances effortlessly with Cloudshot. Execute commands, manage users, and track command history—all in one place. Take control of your cloud infrastructure with a powerful and intuitive terminal experience. 🚀
. . .
Join Our Cloud Revolution! 🌐
Follow us for the latest in cloud visualization:
- 💼 LinkedIn: Cloudshot
- 📺 YouTube: @cloudshot-io
- 🚀 Website: cloudshot.io